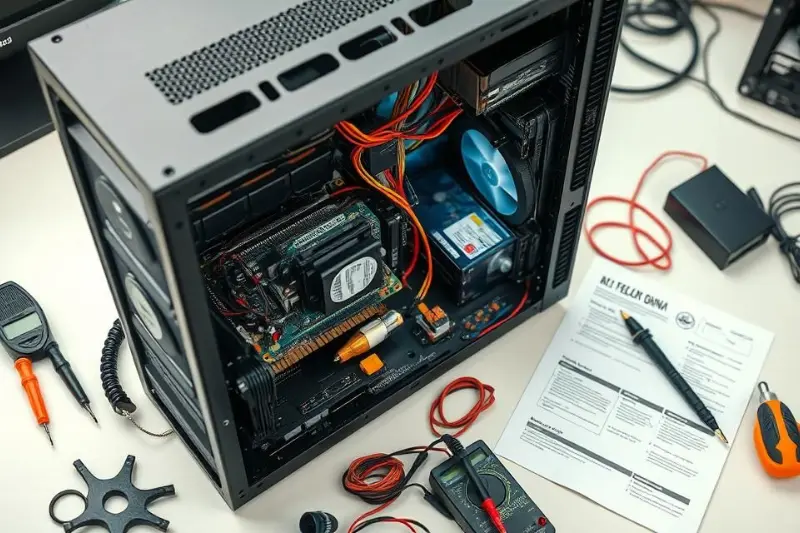
Building a computer can be intimidating for beginners, but understanding proper PC component installation tips makes the process smooth and safe. This guide covers the installation of CPU, GPU, RAM, storage devices, motherboard, and other essential components, ensuring your system works efficiently without damage.
Preparing for PC Assembly

PC component installation tips-Before starting, ensure you have:
- A clean, static-free workspace
- Anti-static wrist strap
- All components (CPU, GPU, RAM, storage, PSU, motherboard, case)
- Screwdrivers and necessary tools
- Thermal paste (if not pre-applied on CPU cooler)
Preparation is the first tip in PC component installation tips for a safe assembly.
Installing the Motherboard
PC component installation tips-The motherboard is the foundation of your PC.
Steps for Motherboard Installation
- Place the I/O shield in the case.
- Align the motherboard with standoffs in the case.
- Secure the motherboard using screws without overtightening.
- Connect power connectors (24-pin and CPU 8-pin).
PC component installation tips-Ensure no cables block the airflow, which is crucial for component longevity.
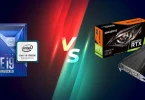
CPU Installation
PC component installation tips-The CPU is the brain of your computer.
Steps for CPU Installation
- Open the CPU socket latch carefully.
- Align the CPU with the socket (check the corner marker).
- Place the CPU gently without forcing it.
- Close the latch securely.
- Apply thermal paste if required.
- Attach the CPU cooler firmly.
PC component installation tips-Proper CPU installation prevents overheating and ensures stable performance.
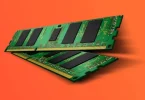
Installing RAM
RAM is essential for multitasking and system speed.
Steps for RAM Installation
- Open the RAM slot latches.
- Align the notch on the RAM stick with the slot.
- Press down evenly until it clicks into place.
- Install RAM in dual-channel configuration if applicable.
PC component installation tips-Correct RAM installation improves memory performance and prevents boot errors.
GPU Installation
PC component installation tips-The GPU handles graphics and gaming performance.
Steps for GPU Installation
- Remove the appropriate PCIe slot cover.
- Insert the GPU into the PCIe x16 slot on the motherboard.
- Secure the GPU with screws.
- Connect PCIe power cables from PSU if required.
PC component installation tips-Ensure the GPU is seated properly to avoid display issues.
You may also like to read these posts:
Complete Home Office PC Guide for Smart Remote Work
Latest Smartphone Reviews: Top Phones Tested 2025–2026
Top Laptop Reviews 2026 — Best Picks for Every Need
Wearable Tech Reviews 2026 — Top Gadgets Evaluated
Installing Storage Devices
PC component installation tips-Storage devices include SSDs and HDDs.
Steps for Storage Installation
- Mount 2.5-inch SSD or 3.5-inch HDD in the drive bays.
- Secure the drives with screws or tool-less mounts.
- Connect SATA data cables to motherboard.
- Connect power cables from PSU.
For NVMe SSDs, insert the M.2 drive at an angle, secure with a screw, and ensure proper thermal pads if available.
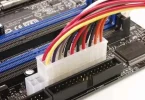
Connecting the Power Supply (PSU)
The PSU provides electricity to all components.
Tips for PSU Installation
- Mount PSU in the case and secure screws.
- Connect all necessary cables: 24-pin, CPU 8-pin, GPU PCIe, SATA power.
- Route cables to avoid airflow obstruction.
Proper cable management prevents overheating and improves aesthetics.
Installing Cooling Solutions
Cooling is vital for system stability.
Types of Cooling
- Air coolers: Install fan directly on CPU, ensure airflow direction.
- Liquid coolers: Mount radiator and fans, connect pump to CPU header.
Cooling Tips
- Apply thermal paste evenly.
- Ensure airflow follows intake and exhaust paths.
- Avoid cable interference with fans.
Cable Management Tips
Good cable management improves airflow and prevents accidental disconnections.
- Use zip ties or Velcro straps
- Route cables behind the motherboard tray
- Keep cables away from fans and heat sources
- Label cables if necessary
Common Mistakes to Avoid
- Forcing components into slots
- Forgetting CPU thermal paste
- Installing RAM or GPU incorrectly
- Loose screws causing short circuits
- Neglecting anti-static precautions
Avoiding these mistakes is crucial in PC component installation tips.
Testing the Build
After installation:
- Connect monitor, keyboard, and mouse.
- Power on the system.
- Check BIOS/UEFI for component recognition.
- Ensure fans are spinning and no unusual noises.
- Install operating system and drivers.
Testing ensures your build works correctly before full setup.
Frequently Asked Questions
Do I need an anti-static wrist strap?
Yes, it prevents electrostatic discharge that can damage sensitive components.
Can I install components in any order?
It’s recommended to start with CPU, RAM, and motherboard, then PSU, storage, and GPU for easier assembly.
How do I know if the CPU cooler is installed correctly?
The CPU temperature should remain within safe limits, and the cooler should sit firmly with no movement.
What is the best way to manage cables?
Use zip ties, route cables behind the motherboard tray, and keep them away from fans to maintain airflow.
How can I test my PC after installation?
Power on, check BIOS/UEFI for component recognition, verify fan operation, and install the OS and drivers.
Conclusion
Following these PC component installation tips ensures a smooth, safe, and efficient build. Proper installation of CPU, GPU, RAM, storage, motherboard, PSU, and cooling systems prevents hardware damage and improves system performance. Beginners who follow these tips gain confidence, build a reliable PC, and enjoy better stability, performance, and upgrade possibilities.